Part 29: Chapter 18 and the War Room, Part 46 (Choosing Characters)

This is the heart of the Ilian arc and, in my opinion, the best outdoor map in the game. Map design-wise it’s the kind of thing you might find somewhere in the early 20s of FE7. It’s got unusual terrain that encourages unusual tactics (in a way beyond just the typical air-mass that usually solves terrain problems). There are staff users and a purge-wielder, but instead of just needing to turtle up and cure their statuses, you can actually deal with them in interesting ways. And there’s lots of enemies which pose a moderate threat and use the map’s terrain to their advantage well, but which are manageable if you know what you’re doing.
It’s- dare I say it- actually kind of fun.
The script remains infuriatingly bad though.
Chapter Summary:

They aren’t kidding.

Yet another lookalike bishop.
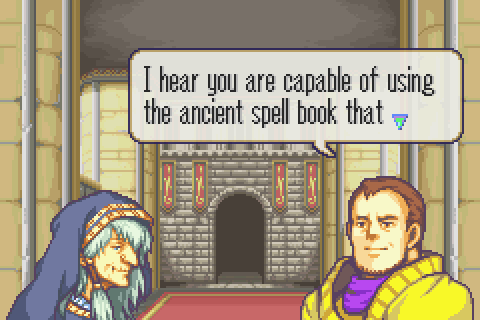
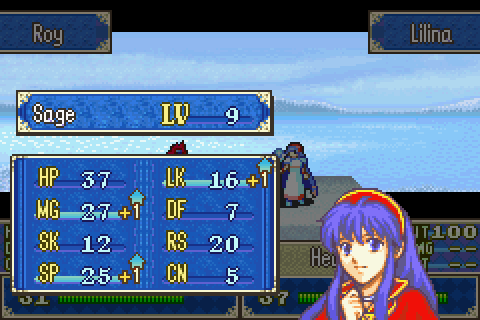
They found some kind of forgotten ancient uber-spell and think only she, their best dark wizard, may be able to cast it.
Wait, what? No you haven’t. I’m betting that’s a flub by the translation, not the original script. It’s pretty clear elsewhere she’s not even a century old.

Sound familiar? Maybe a bit like a spell that her son couldn't quite manage to cast the first time it was tried?

Well that’s one plan. As far as a way to use a single-use weather control uber-spell from the days of yore goes, it’s a pretty lame one.

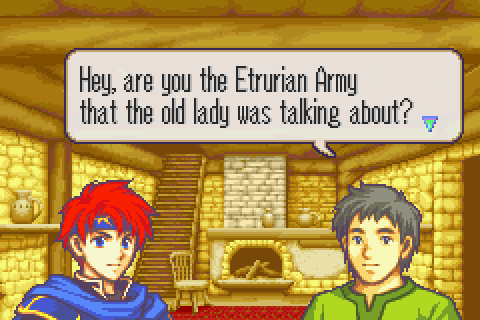
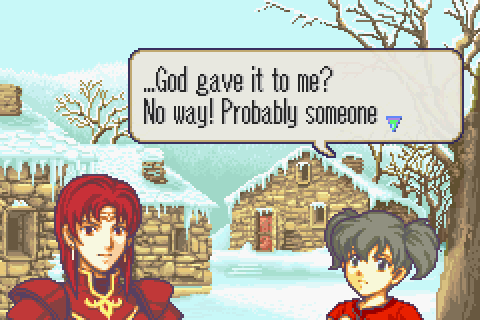
Roy decides to directly ask Guinevere if it’s true that Zephiel murdered his father for the throne. That’s… pretty gauche.
“I’d rather split the story up into a bunch of tiny pieces at the end of the next several chapters for no reason.”

For the first time in forever, Merlinus actually has something useful to say. For Roy anyway. Not for us; we already know because of yet another enemy cutscene. I think the scene order should have been the other way around here.
The War Room, Part 46
I’ve really begun running out of things to talk about, but one new one occurred to me recently. I’ve talked a bit about how to do good battle preparations in the War Room parts 14 (http://forums.somethingawful.com/showthread.php?threadid=3701153&pagenumber=5#post441877689) and 44 (http://forums.somethingawful.com/showthread.php?threadid=3716259&pagenumber=16#post445399226), as well as tangentially elsewhere. One thing I talked little about directly is how to actually pick out characters for a chapter.
If you’re not doing a max ranking run, that’s usually pretty self-explanatory. Just bring your best people, maybe plus or minus a healer or a flyer.
On max ranking runs- and especially on HHM in FE7 where the number of characters allowed was sharply decreased- it’s a much more important strategic decision.
Even on the most straightforward chapters, you need to strike a good balance between strong people and low-level people, and the game’s more complex chapters are far trickier.
On every chapter, some of your limited party slots must be devoted to some of the following:
1) Healers. Always an important role for keeping your party functioning, and good for your XP score too.
2) Restorers. Got to cure those statuses.
3) Thieves. Can’t steal or get many treasures without them. Or see in fog.
4) Flyers. There are so many things flying units are good at that it’s hard to know where to begin the list. Fighting in rough terrain, flanking tough enemies to finish them off, getting places with matchless speed, and blocking enemy flyers from flanking you are only a few.
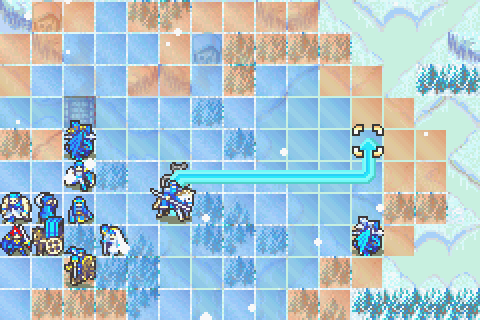
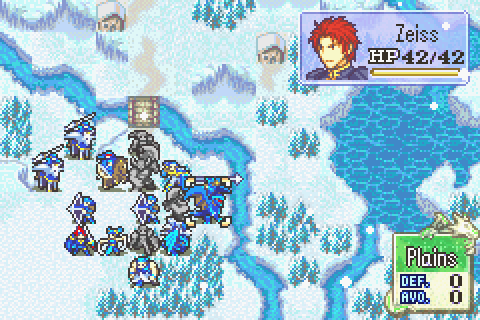
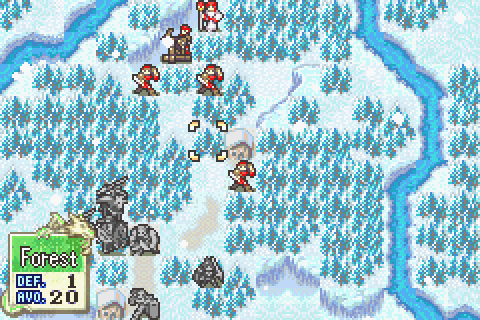
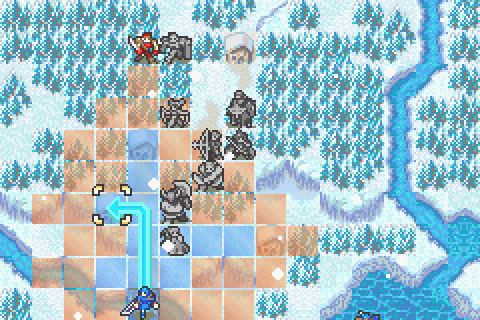
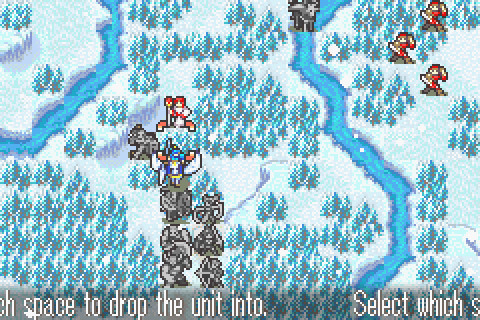
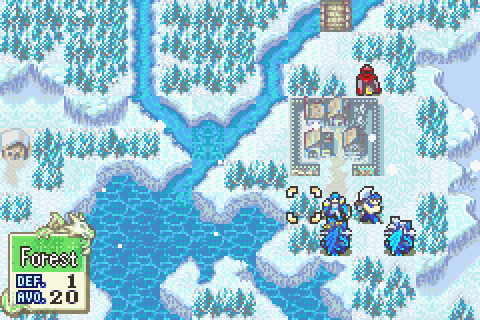
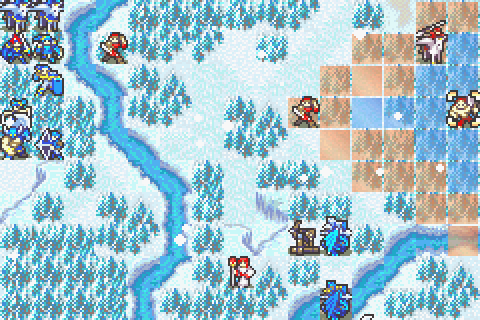
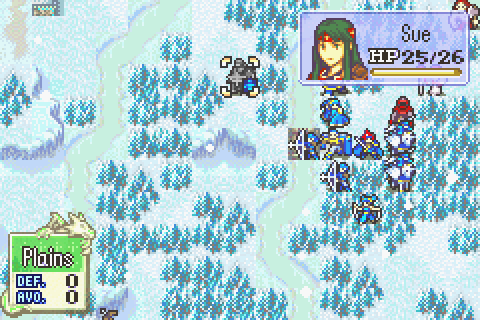
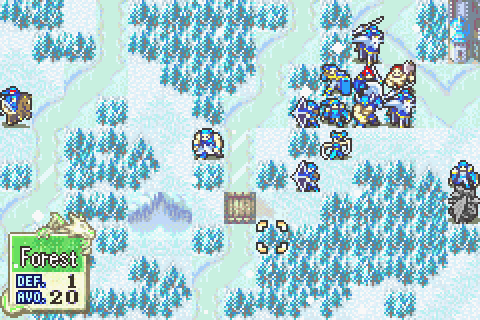
5) Carriers. I’ve talked about this many times and I’ll talk about it many more. Good use of rescue-dropping is THE key to expert tactics in the GBA fire emblems and many of the others too. If you’re not using it, you’re not playing like an expert. One of its most critical roles is preventing your party from getting strung out while you fight. A party with only 4 people at the front and everyone else lagging behind is a party of only 4 people instead of 14. You can see the effects of that even on one of my own recent chapters:

This was a really tough spot for me because I couldn’t bring most of my forces to bear. I struggled to even kill those 3 enemies, let alone give the kills to low level people. That would not have happened if I had a few more carriers along helping out to keep the slow people from falling behind.
6) Recruiters. When this isn’t your main lord, you’d better not forget to bring the person.
7) People who can kill stuff. Especially the boss. There’s nothing worse than clearing the chapter like a pro and then realizing you’re going to be stuck for 5 turns trying to down the boss because you can’t get past his huge def or avoid on that throne.
Only after any of those needed roles are filled can you bring:
8) Low-level people. Staff-grind and dance all you want; sooner or later you MUST use a bunch of low-level people to get your max XP rank.
9) People who can not-quite kill stuff. Especially if you’re short on strong low-level people, this is a critical category for letting the low level people actually get XP.
You’ll notice I don’t list “tanks” anywhere. You should never play so passively that you’re doing nothing but trying to survive with statistical brute force. Find ways to eliminate the threats or reduce their impact or to just barely survive with weaker people who can do more useful stuff. Don’t waste one of your precious slots on a person whose only job is to take hits. There is no GBA chapter so brutal that that’s required.
The goal is to maximize the number of characters of type 8 (and maybe 9) while still completing all objectives quickly. That’s partly a matter of choosing your type 7s well. Pick characters who can crush all needed resistance without difficulty and rely on quality over quantity. If you use a unit who’s highly effective at the chapter, you don’t need to use 2 or 3 who are just generic good units.
The most important thing though is finding ways to combine roles or do without. If you bring a sage, you can count that unit as both a healer and probably a person who can kill stuff when making your plans. If you find ways to let a thief get some kills, you make a tidy XP profit. By giving a strong unit a mix of very weak (Like slim weapons and javelins) and very powerful gear, you can perhaps have that person be both a killer and an almost-killer. If you bring a pegasus knight, that’s both a flyer and a carrier (some wyvern riders like Miledy and Vaida, not to mention Myrrh, are just not good carriers).
And Dancers are amazing because you can kind of count them like a spare of every unit role you’re bringing.
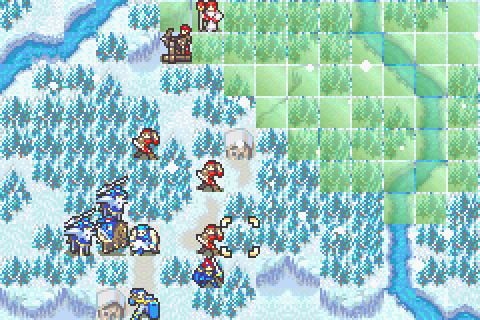
Another thing to become good at is finding ways to do without units who seem necessary. Thieves are one key starting point. Chest keys are hard to buy in FE7, but you should pick up many sets at the secret shop where they’re available. In FE6 there’s no excuse for not picking up half a dozen sets early on. As long as you maintain a good supply of door and chest keys, you can outright do without thieves on many chapters. On those that still have stuff to steal, you may still be able to bring fewer thieves if other people are opening the doors and chests in one part of the map. My runs of Battle Before Dawn and the recent chapter 16 are good examples of this:
There’s no thief in the right group of Battle Before Dawn, as you can see. Hector has the keys to those chests and other people have torches. That let me bring enough mounted units to move with the required speed.
Another way to cut down on thieves is to use rescue-chaining to get a single thief quickly from one group of chests or stealable items to a distant one.
It can be somewhat trickier to do without Restore users, but it IS viable on a lot of chapters. If the status-staff in question is just Silence or Sleep and it won’t be hitting you at a key phase of the map, you may be able to just ignore it. Even if it’s Berserk, you may be able to avoid bringing a Restore wielder if you can contrive a way to kill that staff-user early. This is often easily done with a flyer + a dancer even if the staff-user is rather high level and strong.
If you can plan a party split where one group doesn’t need to go quickly, you might be able to bring fewer carriers. Alternately, you can just bring an all-cavalry kind of party where no one needs to be carried much, which is more efficient on some maps like Whereabouts Unknown in 7 and perhaps chapter 8 in this game.
If you have a choice of recruiter characters, always bring the one who’ll be more useful and see if you can leave the other behind. For that matter, plan on using the recruited character. Have their recruiter or someone else carry gear to give for them. Perhaps if you’re recruiting a thief, you don’t need to bring a thief too.
And then the trickiest but most essential way to save space for trainees is to find ways to let weak units do the work of strong ones. A lot of the time, you don’t actually need the high level people you think you need to complete a chapter as long as you have carefully chosen equipment and good tactics.
If you can keep those tricks and principles in mind, you’ll be on your way to a party that’s better for both XP and tactics.
Battle Preparations & the Map:
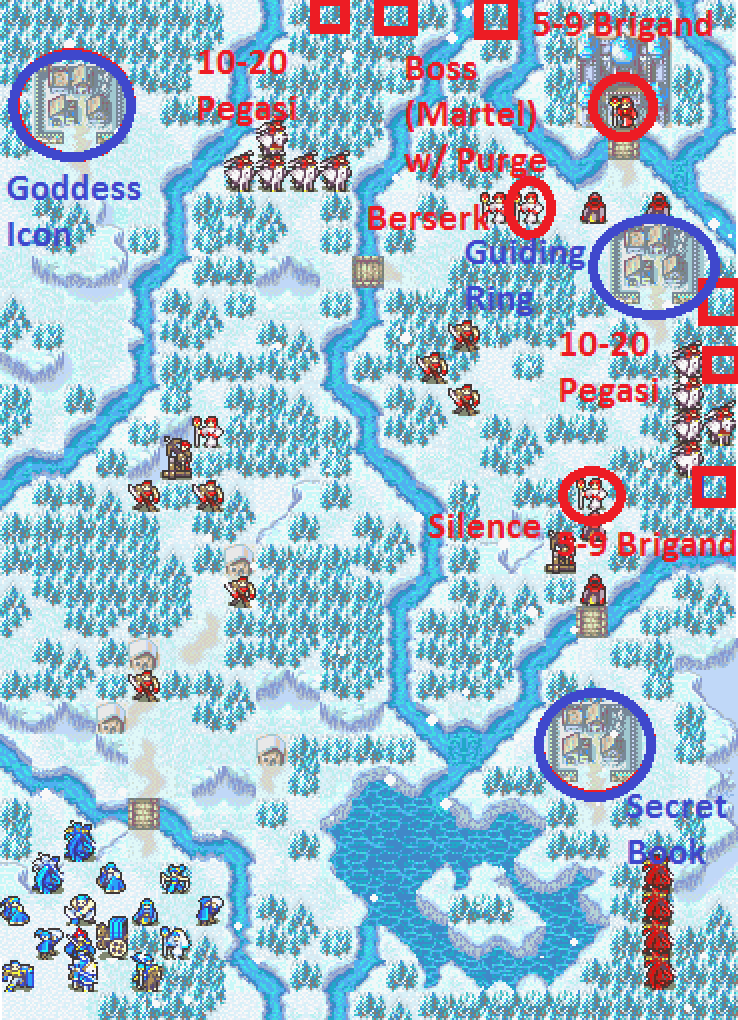
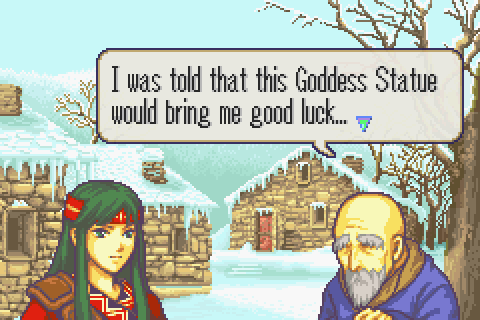
Secondary Objective: Get the Goddess Icon from the top left village
Secondary Objective: Get the Guiding Ring from the top right village
Secondary Objective: Get the Secret Book from the bottom right village
Reinforcements: Tons. First, there are brigands with handaxes from a spot in the top middle and another in the mid right from turns 5 to 9. These will quickly destroy villages if you aren’t using flyers or Warp to get there. Just as problematically, a huge number of pegasi (44 total) will spawn from the top middle and middle right. They have a mix of javelins and steel lances.
Turn Limit: 25. Easy even if you’re terrible at getting through the forests. What’s hard is winning just after killing all reinforcements.
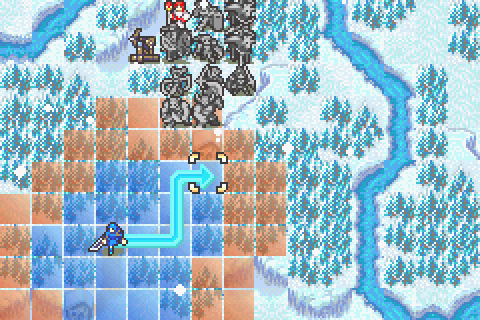
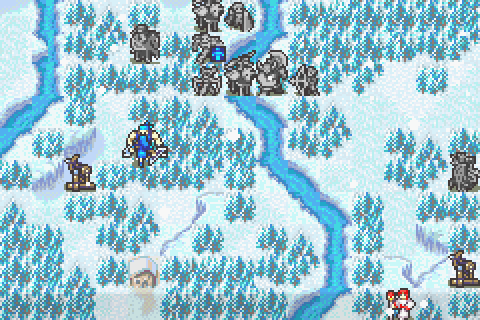
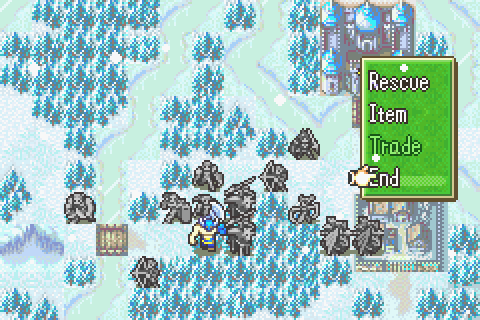
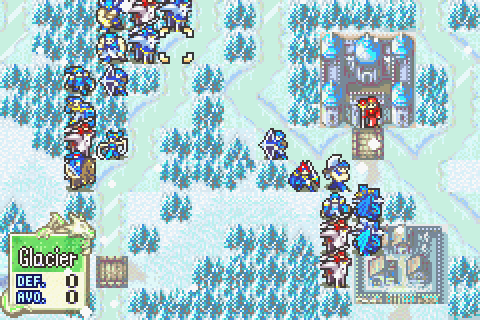
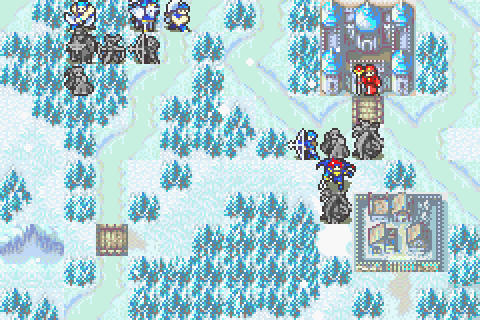
Unlike on Pale Flower of Darkness, the snow here is cosmetic and doesn’t slow you down. No, the heavy forests everywhere are what do that. And the rivers funneling you through chokepoint bridges.
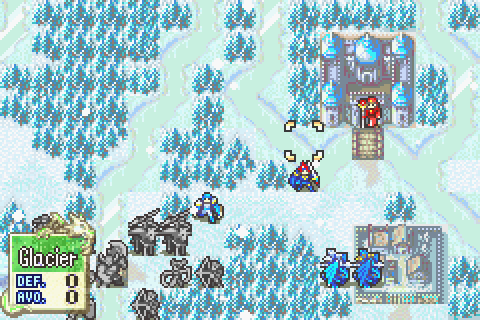
Critically, those rivers stop being a problem on turn 7...
... on that turn they flash freeze and then can be crossed by all units just like plains. Very handy.
But there’s a long time between now and turn 7 and a lot of distance to cross. In particular, you have till just turn 8 or so to reach the top right village before it’s destroyed. Flyers are key for moving on this map, but you can’t really rely on them exclusively. They can carry a few other people around, but you’ll also need to use some promoted infantry and mages to move with reasonable speed and also do some infantry rescue-dropping to gain a bit of extra distance. Most importantly, you need to plan your moves so people don’t get in each other’s way.
Now the enemy is well-equipped to make use of the terrain here: they have extremely numerous flyers and also several staff users who can cause severe problems while you’re bogged down. Even the ballisticians can’t be ignored. You need many anti-air units (axe-users, other air units, aircalibur, and maybe even some bows). You also need a plan for dealing with the Berserk staff user in particular. In this rough terrain, it can be hard or impossible to reach his target and restore them.
Wow, it's so refreshing to have a map that calls for serious strategy!

Oh and just an interesting oddity, you can place some of your units in illegal terrain like this cliff as a starting position.
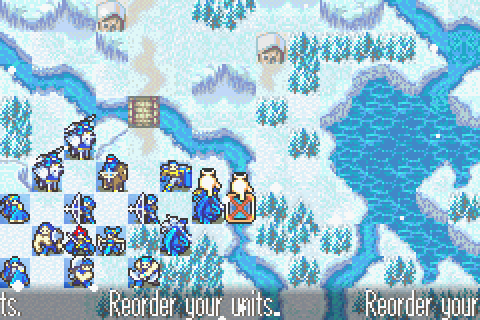
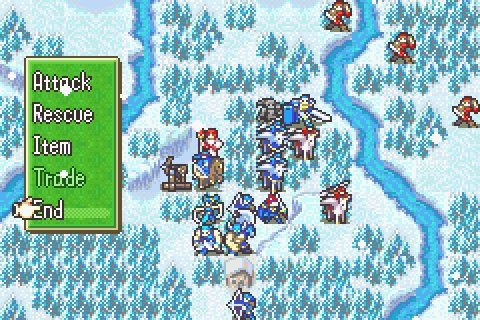
Units Allowed: 14 + Roy. Wow, that’s generous.
Units Brought:
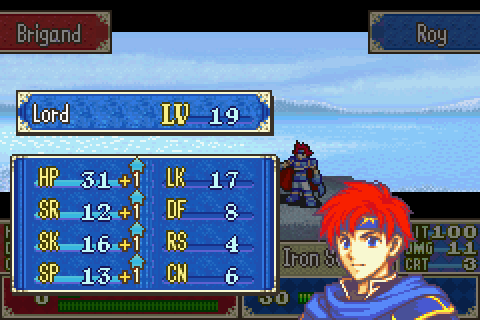
1) Roy. Required. He’s terrible against pegasi and worse against mercenaries, but I need to train him up the last few levels to 20 before Chapter 21. I don’t want to be training him there.
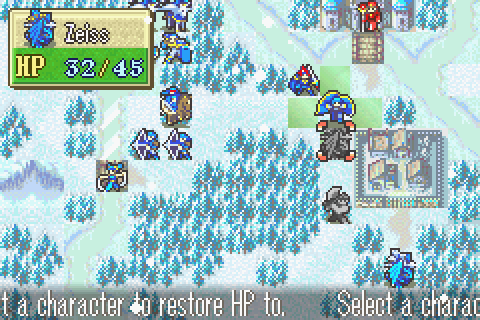
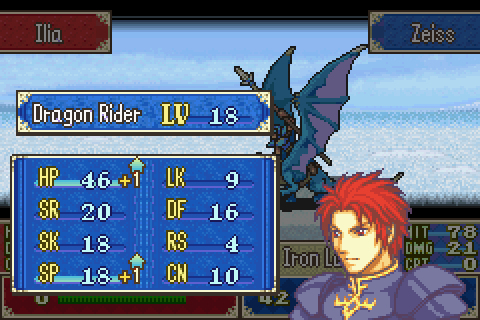
2) Zeiss. It’s an air map. Additionally, this is a really good place to train him.
3) Miledy. Air map.
4) Tate. Air map.
5) Thany. Air map. She’s also useful for feeding kills to weak people because she can’t even one-round pegasus knights.
6) Oujay. My leading anti-mercenary man because with an iron sword he leaves them just barely alive. He’s highly effective in general of course.
7) Lilina. My primary healer since I’m trying very hard to raise her staff ranking. She should also build more supports with Oujay and Gonzalez.
8) Gonzalez. He’s ready to promote. As an axe user, he’s unusually strong here. He’s also capable of fording the rivers easily before they freeze. And he has support to build.
9) Hugh. A needed second healer because there must be a party split here. He’s also good at not quite killing things for weaker people.
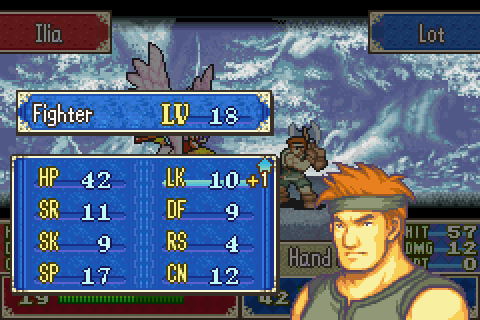
10) Lot. Axe-wielders do quite well farming all the pegasi here. Lot in particular excels because he can double them.
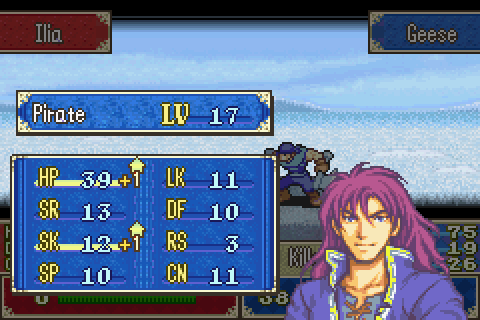
11) Geese. Like Lot but terrible because of his lousy level ups last chapter.
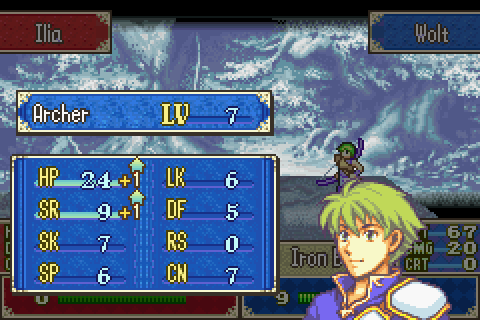
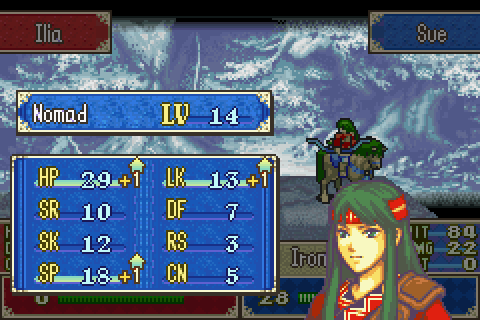
12) Sue. My best low-level bow-user. This is a good chance to give her some easy XP.
13) Dorothy. A lousy, lower-level bow user. This may be my only chance to give her some easy XP.
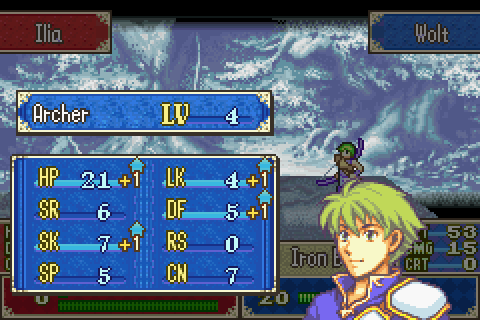
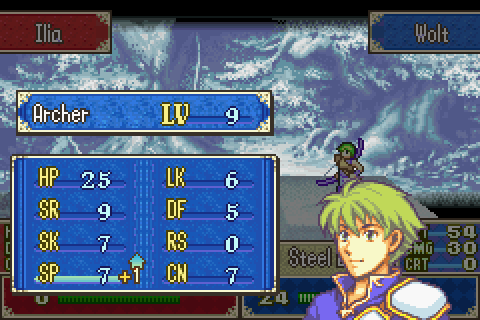
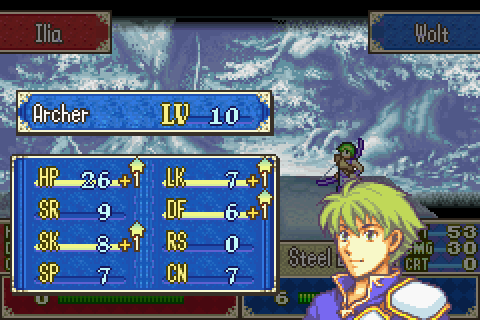
14) Wolt. The worst unit in the game and one of my lowest-level units. This is the only chance to give him a bunch of easy XP.
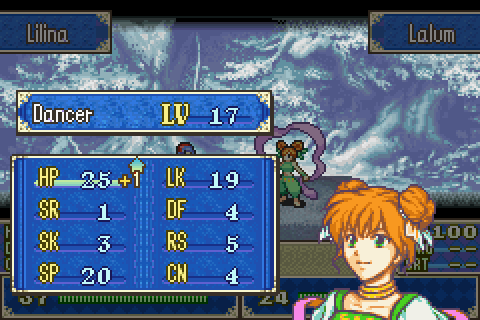
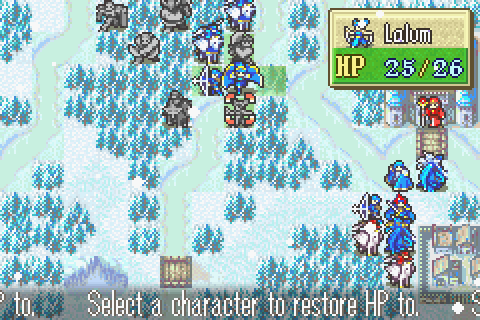
15) Lalum. Critical for training weak people and dealing with the enemy staff users as well as for helping Lilina staff grind. And keeping everyone moving efficiently. Yeah, she’s amazingly good as usual.
Notable Units Rejected:
1) Ward. He’s just TOO bad. I really wanted to take this chance to train him, but he can’t do it! Every pegasus knight will double him and kill him and his accuracy is worse than Sophia’s! At least the archers can stay back from their targets and deal super-effective damage.
2) Sophia. She’s doing just terribly and she’s incredibly bad against pegasus knights in particular. It would be really hard to keep her alive while using her here.
3) Saul, Clarine, Ellen, and Cecilia. All level 20 or just terrible- or both. Because the terrain is wide open for flyers and there’s only one low-level guy with Berserk, I think I can do without restores.
4) Fa. Unlike Myrrh, she doesn’t fly, so she’s pretty bad here. I might consider her if she could instant-kill pegasus knights, but she can’t quite do that.
5) Other strong units. This is actually a really manageable map if you play smart. I think I can keep all these weak people alive and train them well without bringing anyone else.
6) The armor knights. No.
Most gear is fairly standard, though I’ve broken out some of the new stock of killer weapons. The Brave Axe is gone, so Geese isn’t wielding that anymore. Geese has the swordreaver because Lot won’t be fighting any sword units, and Gonzalez probably won’t either.
I didn’t bother bringing most of the legendary weapons, though Oujay does have Durandal just in case.
Dororthy and Wolt can’t use any good bows so they just have iron and steel. Sue has the longbow and a killer bow too.
Gonzalez is ready to promote with his hero crest. Other than that, most gear is unremarkable.
Now this formation was carefully chosen. In particular, it allows for one group led by Miledy and Zeiss to immediately set out east. The pegasi can carry someone slow across the river and north into the forests and then destroy the ballista on the next turn. Oujay can severely weaken the first mercenary for either Wolt or Sue. If Wolt gets the kill, Sue will help carry people into position instead.
In short, it allows for very rapid deployment and elimination of important targets early on.
The Characters:

A completely generic enemy bishop. Why he joined Bern when the Elimine church is now firmly on Roy’s side is a mystery. For that matter, why is a bishop a general of Bern anyway? Particularly when Zephiel doesn’t much like the church.
He’s really not a big threat in a fight. Bosses have generally ceased to be hard to kill.
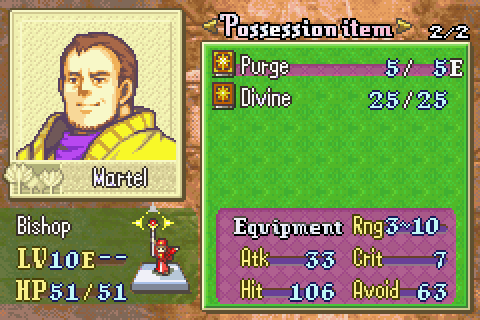
He IS pretty good with this dangerous Purge, but since he doesn’t move and isn’t in an important place, it’s not so bad.
Playing Through:
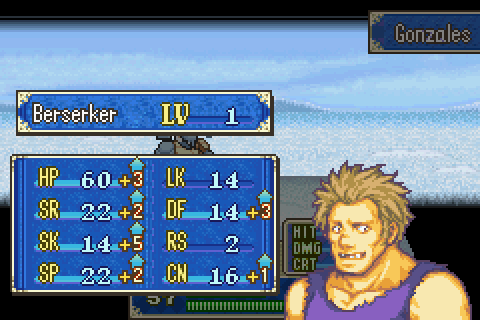
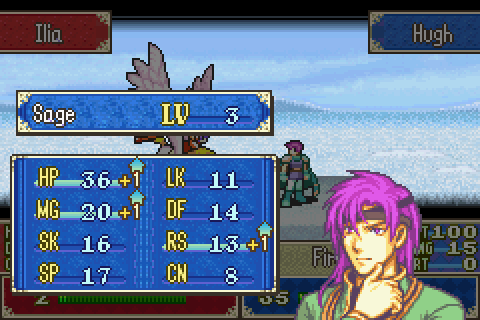
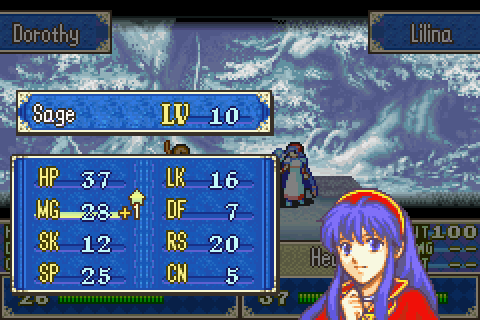
Gonzales's promotion is a game changer for him; Brigand Gonzales and Berserker Gonzales are very different units.
First of all, the massive increases in Skill and Def solve all his combat problems and cement his status as a true master on both offense and defense.
Further, Berserker is one of the game’s best classes. He can now walk over not only peaks and mountains, but also rivers and oceans (and lakes to some extent).
Oh and notice that his HP is immediately capped. In fact, he was supposed to gain 4 HP but already had too much. Crazy.
However, it’s not all good news. He now has a constant +30 bonus to his crit chance. Critical hits are often terrible on a max ranking run. Furthermore, his +1 Con doesn’t really let him wield any new weapons but it DOES mean that no one can carry him anymore.
Thus he has a bunch of new and improved capabilities, but also 2 serious new problems.
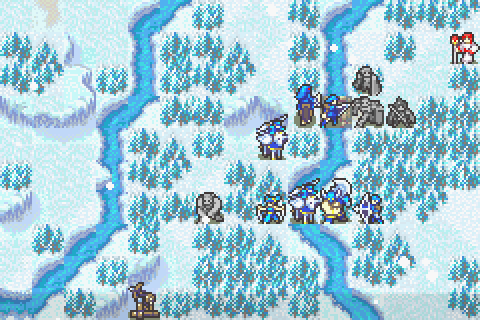
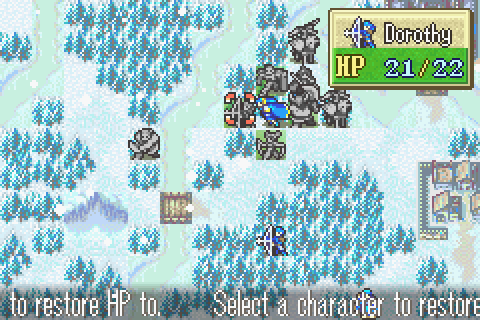
Anyway, Lilina heals him and everyone gets in position for the first round of rescues.

Miledy can't take Lot, so Zeiss does that while she carries Hugh instead. They fly at maximum speed and end up right on the edge of enemy range, just as planned.
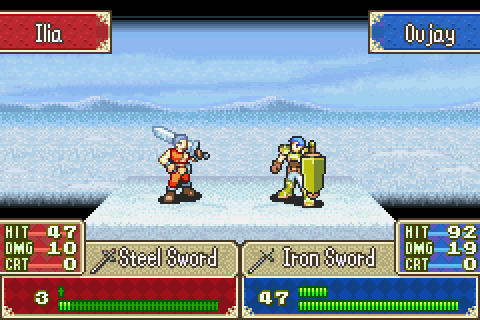
Then Oujay charges the mercenary and leaves it barely alive.

Wolt finishes it. His hit chance was awful, but Sue could have done it if he failed. That’s a pretty good level for right now. It means I can hopefully use the iron bow instead of the steel one to finish things now and it also increases his hit odds.
Everyone gets ready for the next round of rescues.

Thany and Tate get the swordreaver-wielding Geese in position and prepare to deal with the ballista.
Lalum helps Sue carry Roy.
And turn 1 finish. That was the kind of cool, smooth turn where I accomplish all kinds of clever stuff that I did a lot of in 7 but that 6 never really encourages.
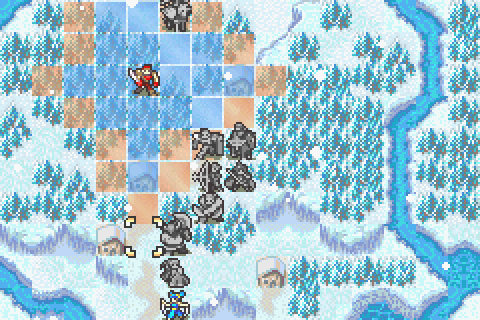
Turn 2 begins; here’s the all-important Berserk range (the Berserk-wielder moves). You can see that it doesn’t quite cover the ballistician.
So Thany and Tate take him out before he shoots at someone fragile like Wolt again. (Wolt survived with 1 HP, as I knew he would).

The first mercenary proves really hard to kill, but Sue and Roy manage to let Geese do the honors.

And Wolt gets the second one.
Which leaves the third contained. In order to speed things up, Lalum dances for Oujay and sends him after the third.

Uh oh. Now he might kill some of the more fragile mercenaries outright.
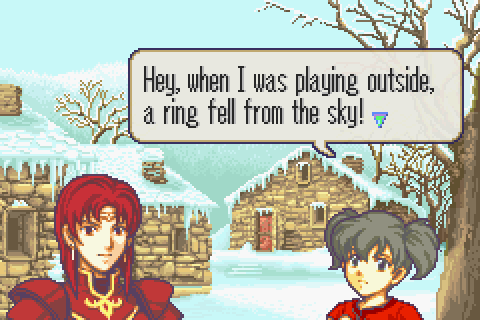
Lalum will bait the mercenary so that he’s available to feed to someone else. For now Dorothy visits a random house.

Yeah, so Martel apparently went through the village telling all the peasants that he had a secret weapon to use against us. What an idiot.

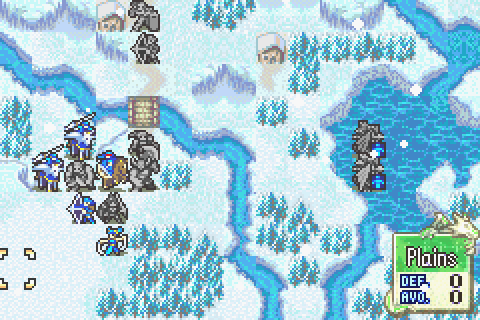
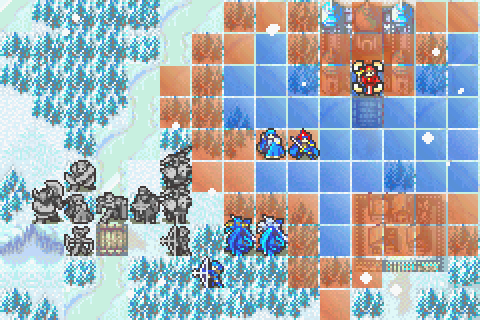
Turn 2 isn’t over! Here’s the right side group’s situation.
This setup isn’t quite ideal, but it should do. The land units are on forests, not everyone can reach Hugh to suicide to him, etc. So hopefully Zeiss and Lot can get some kills. That’s the turn.

Bad luck ensues as just about everyone is hit with just about everything this turn.
Bizarrely, about half the wyverns went after Hugh and half went after Zeiss. Even ones who could reach both were undecided.

So turn 3, here’s the new Berserk range. That guy is now well within striking distance.
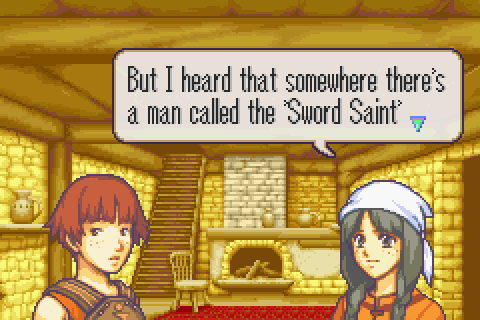
Dorothy can’t actually finish the mercenary, so I have her visit a house again instead. This one blathers on with random rumors about some guy stronger than us somewhere called the “Sword Saint”. What does that have to do with anything?
Roy also has little to do, so he visits a house. I do try to visit all of them on every chapter as an unofficial bragging rights goal.

The plot thickens.

This fellow who Oujay double-missed is not the Berserk staff user. He’s just a guy with Physic that I wanted to weaken for someone else.

Tate ready for launch in 5, 4, 3, …
Well Tate killed the berserk priest easily, so Thany just helps Sue drop Lilina closer to the action.

And everyone weak is shielded from the dangerous falcokninght.

Now for the right side group.

Zeiss gets a bad level finishing one wyvern.

Hugh heals and Lot gets the other one with Miledy’s help. That’s the turn.

Tate has her killer lance out since I want most of these pegasi dead this turn. The situation isn’t controlled enough to train weak people on them safely. Oh and a bad level. Oh and I don’t think I’ve mentioned it before, but the enemy attack battle theme is one of the worst in the series (https://www.youtube.com/watch?v=2Z1lnbaUjmw). The audio quality in this game is weirdly terrible for the GBA in general, but the tunes themselves are nothing inspired either.

Thany gets one too. I expected more focus-firing from these enemies.

Hugh has been dodging ~5% silences on the right side, which is convenient but not necessary.

So turn 4. There’s more enemies than I’d like, but at least they’re in out of the way areas.
Lilina is doing a double heal nearly every turn. Tate flies back to safety to receive one of them.
Wolt finishes the falcoknight for a ton of XP and a decent level.

And Oujay and Lilina finally get their first support!

She pretty much just asks him about life as a peasant.

He doesn’t mind her prying.

And then she asks a bunch of stuff about his family.
Dorothy is having a hard time keeping up. I’ve wanted to give most kills to Wolt anyway, but I do need to get her in on the action. This is a situation where more carrier units would be good, but the flyers were busy until now.
Now the right side continues their own little campaign.

Lot finishes off the shaman.

There’s not a ton to do, so Miledy visits the village now.

The villagers don’t seem to like either side much.

So they give us amazingly valuable treasures.

And she moves to support Zeiss and get healed by Hugh. That’s the turn.

Lot gets even faster as one of a group of pegasi flies down alone to attack him.
I’ll shake things up by starting turn 5 with these guys.
Miledy gets a lousy level from the archer on the ballista.

This time Lot gives the shaman to Zeiss, while Hugh continues healing. They’ve broken through.
It’s a somewhat slow turn for the left group too, though that pegasus up the cliff is annoying.

Sue takes one down easily.

And Wolt gets the other.

Dorothy keeps slogging.

Thany and Tate dump Roy closer to the action.
Lalum gets a bad level as she lets Lilina keep healing. And that’s pretty much it.
This brigand spawns as the enemy’s turn begins. The right side will need to intercept him quickly.
… wow.

Not much to do but move in. Critically, Miledy DID get in range of the brigand, so the village is safe.

Now for turn 6 on the left side. More heals!

Sue kills the top mercenary for a cruddy level. She’s actually still doing really well from all those lucky Str gains before.

A critical runs my plans once again.
Alright, this is a transport puzzle now. I’ve got too many people lagging behind and it’s time I did something about that.
Gonzalez ferries Wolt right across the river.

Classic! Man, that’s funny. Remember how way back on chapter 6 this was all she ever got? That’s why I retired her immediately in the first place. Well anyway, that priest is finally dead.
And Geese picks her up. It’s not much of a rescue, but it will help.
Next turn, this is Martel’s true Purge range.

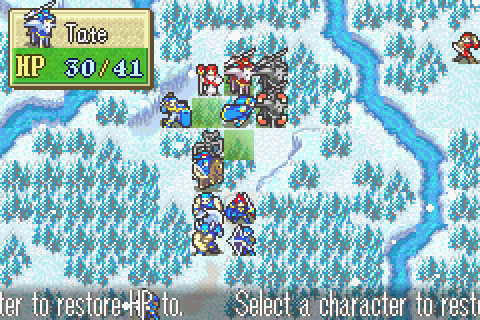
More heals. Two per turn whenever I can.
Geese and Sue chain Dorothy along and she actually gets to a spot near the front.

I’ve been trying to get Gonzalez and Oujay both next to Lilina at once all level, now I’ve finally managed it.
Lalum is transported over the river.

The right group is almost ready to rejoin them. More heals first though. That’s pretty much the turn.

Uh oh!

This may or may not be true. Possibly she’s just setting up plausible deniability for when she sabotages them.

And there she goes.

She claims doing the opposite of what he wanted was just an accident, but he doesn’t buy it. Why isn’t a spell to control nature Anima magic anyway? In any case, I doubt it’s a coincidence that 20 years ago her son died trying to learn to control a snowstorm and now she knows how to use this supposedly lost spell to control the weather.
No. We’re not doing that. Why would we? We already crossed all the rivers anyway, we can take our time now.

The snow affects nothing, man!
My turn. Sue carts Geese around.
The right group is basically done wiping out all standing enemy forces. Now there’s just a few brigands left.

The flyers fear no Purge, so they run right in to start weakening brigands for other people.

Wolt finally gets a good level as he kills off another enemy that was spoon-fed to him.
Dorothy kills the remaining priest.

Oujay waits here…
And then bam, Lalum gets Lilina into perfect support AND heal position.

So here’s the turn 9 situation.

Sue drops Geese and moves to claim the distant village now that the rivers are traversable.
ANOTHER plan to feed an enemy to someone weak ruined by a critical hit.
I do manage to give Roy another kill and he finally gets a good level.
The enemies have been cleared, but the reinforcements are coming soon, so I’m beginning to set up.
The penultimate right side brigand proved surprisingly tough to kill, but I got him. And that’s pretty much the turn.
On turn 10, MIledy visits the right village.
She figures this treasure came from a pegasus or wyvern flying overhead.

… It’s worth all the money. Why do we take this precious treasure from this little kid who doesn’t know what she’s giving up?

The cursor marks the threat range of one pegasus that will spawn this turn.
Here’s the other’s range.
Sue visits the final village.
There! Conclusive proof that you’re supposed to eat the things, like I said all along!

Dorothy gets to safety from the pegasi and kills the last brigand. She finally got a (slightly) different level!

So I THINK she’s safe there. It depends on if the higher of the two right-side pegasi uses javelins or steel lances. I’m almost sure it was steel lances.
Show of hands, is anyone surprised? She just capped her speed!
So Geese and Wolt and Zeiss and Lot are to lure the pegasi. Everyone else is just surviving purge hits, building support, and healing for now.

Of course. Geese starts things off by being hit again. He’s amazingly good at being hit by pegasus knights.

Sue rides back in and kills the leftmost one.

I was really hoping that early strength blessing would continue. She’s disappointing me.
Is that you, Dorothy? Wolt kills the second one.

My positions are going to be increasingly haphazard for a few turns here as I try to give the kills to weak people while not letting them get hit.
You know, I’m pretty sure that’s not the right name for that terrain.

Most people are paired off in their support-building formations as you can see.
Lot gets a cruddy level as he fights the right pegasi. At least he’s better at this than Geese.
Speaking of whom…

Classic Thany.

So I’m not good at predicting who they’ll attack, but I’m still managing to efficiently kill them off every turn and then set up a screen for the fragile people.
Martel is finally out of Purges.

Lot has been struggling with this final brigand for a while now, as you would expect from those accuracies.

But he finally kills him and gets a great level!

2 heals per turn continues. I’ve been doing this for several chapters now and she’s still not even at a D.

Wolt gets an awful level. This is actually a bad Wolt. And that’s saying something.

Lot has been falling behind on killing reinforcements since he had to finish that last brigand, so now there are pegasi everywhere. I’d better solve the problem fast.

More heals.

Zeiss finally picks up a solid level from one of the nearby pegasi. Also, look at that cool Ilian village background!

Wolt is finally capable of instant kills with a steel bow on weak pegasi if he’s lucky enough to hit.
This time he was. He just loves his one-stat level ups.

Lalum is getting close to level 20.

The group as a whole is making a slow advance turn by turn. I’ve got more than enough troops to kill 2 pegasi over there easily.

I’ve shifted Lot mostly out of the way and Zeiss gets most of the right side kills now. He’s finally starting to pick up. On the other hand, it’s Def I really want. He’s going to cap all the left side stuff rapidly anyway.
Lilina can’t be everywhere, so Hugh is still patching people up.

A pretty good level on Sue as the left group continues to move up.

These archers are REALLY hard to train. That’s the main reason I brought so many low level people to this chapter; I knew the archers would miss a lot.

This time Lilina has no one else to heal though so I had Lalum give Dorothy another shot. She finally got a good level! It includes the Dorothy classic of course.

On turn 17 the pegasi behaved rather differently for some reason, so I need to adapt my plans.

Lot gets one last kill and is now retired. Just like Fir. Except for great speed, he came out pretty much average or a bit below in some places.

Dorothy is actually starting to do sort of well, though she still has a long way to go. That 100% Str growth is getting impressive.

I’m beginning to form a pegasus pen. It’s hard due to all the woods.
I just can’t figure out who these pegasus knights are going to target; they’re completely inconsistent.
I keep trying to box the spawn points in.
Sue gets another Sue level.

It’s just too hard too close in quickly; the pen is unfinished for another turn.

Wolt has migrated over to the right since I realized the right group was running out of low-level people. And Miledy finally goes for the boss. I need to weaken him a bit so that I can finish him on 21.

She gets a cruddy level from him.

I’m finally ready to surround the spawnpoints.
Ooh, a good level on Geese at last.
Yes, everything is in order now. I can easily and safely feed the last few to Dorothy and Sue or Geese. And Lot has walked over to relieve someone of wall duty so they can help with the boss.
Finally some stats on Wolt.
And my previously lousy Zeiss is suddenly becoming fast.

Turn 20 dawns. Just one more reinforcement wave left.

Nice! That’ll be Sue’s last level of the chapter.

Ok, Dorothy and Sue were just warming up before. Now they’re finally ready to start getting real levels.
None for Wolt this time though. He’s too injured.

And turn 21 go! I’ve got to kill these last few targets, do as much healing as possible, kill the boss, and seize the throne.

Oh, I spoke too soon.
I’m not complaining after she capped her speed. Also she finally achieved a D in staves.

Miledy gets serious and takes the boss down hard.

You were out of your league.

Zeiss gets the very last kill.

And turn 21 win!

Niime asks to join us, surprising Roy. Merlinus doesn’t pop up to say he doesn’t trust her, surprising me. I guess that means she really IS up to no good.

Oh gee, I wonder what? Not like we already had 2 dark mages do exactly this.
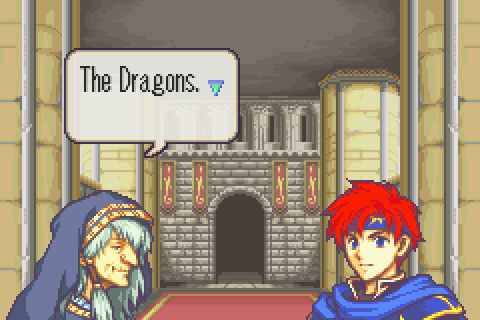
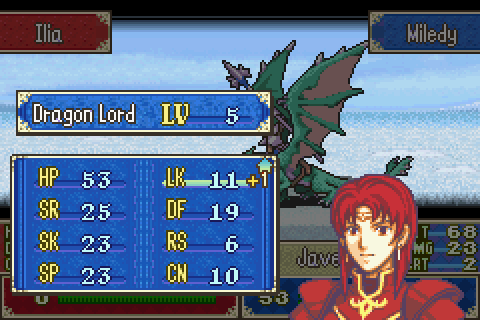
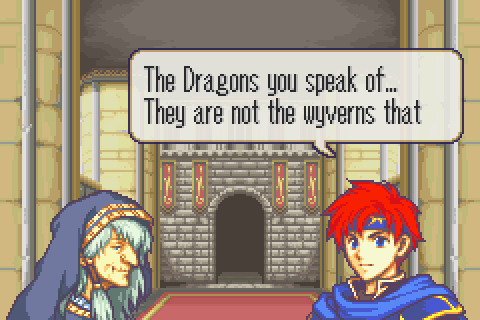
Gasp. The game’s really lousy DRAMATIC EVENT music that we’ve heard many times before begins playing (https://www.youtube.com/watch?v=-xWjEtrBo24). As if it’s even remotely interesting or new that Bern has dragons at this point.
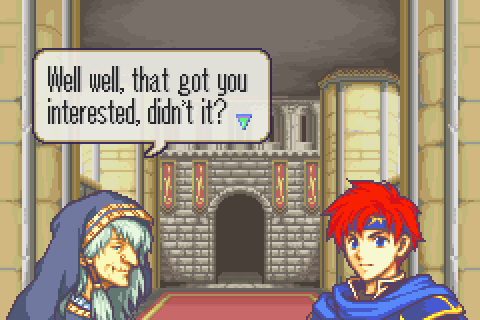
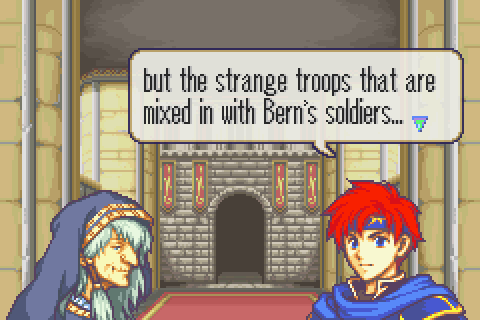
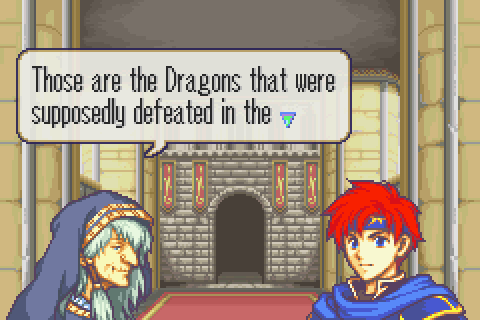
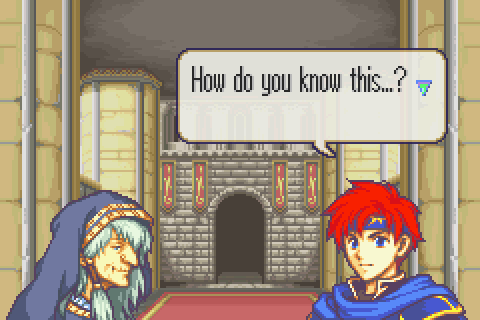
No. No it didn’t. We’ve been over this. Roy has been shocked to learn that Bern has dragons or that dragons aren’t the same as wyverns a dozen times now! We’ve already killed SIX of the things! And we HAVE a dragon in the party! And we’ve learned all about them and how they transform and everything! But somehow Roy is still amazed to learn that dragons even exist every few chapters anyway! I’m sick of it. Just shut up and get to something that we haven’t heard ten ti-
Shutupshutupshutupshutupshutupshutupshutupshutupshutupshutupshutupshutup
Shutupshutupshutupshutupshutupshutupshutupshutupshutupshutupshutupshutup
Shutupshutupshutupshutupshutupshutupshutupshutupshutupshutupshutupshutup
ShutupshutupshutupshutupshutupshutupshutupshutupshutupshutupshutupSHUT UP!
How doesn’t EVERYONE know this by now? It’s incredibly basic history, we’ve heard it over and over again, and everyone should know by now that the dragons are back even though Bern still seems to think they’re somehow secret.

No they aren’t. I just hate this script. It’s insipid. Ah, there we go. I knew I hadn’t used every synonym yet.

Ok, here’s something new. Sort of.

And Roy knows something for once.

What? No they aren’t. The Arcadians are amazed by even basic human technology in their supports.

She eventually moves back into why the Dark Dragon was important after finally giving us some details on the Scouring (Which the translators call the Dragon Human War in this one place). Apparently humans had only been winning due to superior numbers, so the Dark Dragon’s ability to create more of its kind was critical to the war effort.

Don’t let her join, Roy. Don’t do it. No! Darn it.
Well besides that talk about whether dragons are the same as wyverns, that was a pretty good chapter. Fun, even.
I used awful characters, got every village, killed every reinforcement and won on the earliest possible turn for doing that. The XP requirement was 1500 and I got, let’s see, 4200. 42 levels. Someone check my math on this, but I’m pretty sure I’m number one!
Anyway, that’s basically the XP requirement for the whole rest of the game met there. Everything from now on is me doing victory laps. I also think it was more XP than I got on any chapter in either game. I managed 38 on Cog of Destiny.
Total Restarts: 16 (None here)
Turn Surplus: +26 (Another 4)
Things I Regret Missing: A couple of uses of Marcus’s silver lance on Rude, a Chapter 5 nomad Marcus had to kill, two Chapter 12 fighters I couldn’t kill since I needed supports built elsewhere, a pirate and a wyvern rider on 14x who I didn’t have time to go after.
Legendary Weapon Scoreboard: Durandal slew Ohtz using Oujay on chapter 14x, turn 2; and the top left mamkute using Oujay on chapter 16, turn 9; and Arcard using Oujay on chapter 17, turn 16. Forblaze slew the top right mamkute using Lugh on chapter 16, turn 6.